
The translation of content in WordPress through the WPML plugin is not just a matter of titles and pages, there’s much more to it than that. Internationalising your company was never so easy. Let’s get going!
Translating Posts
If you’re using WordPress as a blog rather than as a company, most content you create will be in the form of posts. Unlike pages, posts have dynamic content as they are displayed in chronological order, with the last post to be published being displayed first. Apart from this difference, translating posts is practically identical to translating pages, with the only difference that you must also translate the taxonomies and categories.
The only thing you should consider is whether you really want to translate the posts on your website/blog. The reasons are; for example, that the fact of translating a blog may entail significant costs, that many times the content is not updated or you could even consider publishing different content according to the language.
Translating Personalised Posts
With regard to personalised posts, we are not going to spend much time here, as they are translated the same as posts, including their categories and taxonomies; the translation of which we will explain in the following section.
There are plug-ins or themes on WordPress that allow you to add new content formats, such as sponsors, if you have a section in which you want to publish the companies or entities that sponsor your content or stores, should you decide to publish a list of stores that sell your products.
Translating Taxonomies: Tags and Categories
Both “normal” and personalised WordPress posts use what in this manager are called categories (they define the blog’s main activities and in some way divide them by interests, services or themes) and tags (they describe what is being talked about within each category, therefore each post will have one or more of these assigned by you, according to the theme of the post). To carry out this translation, we have two options:
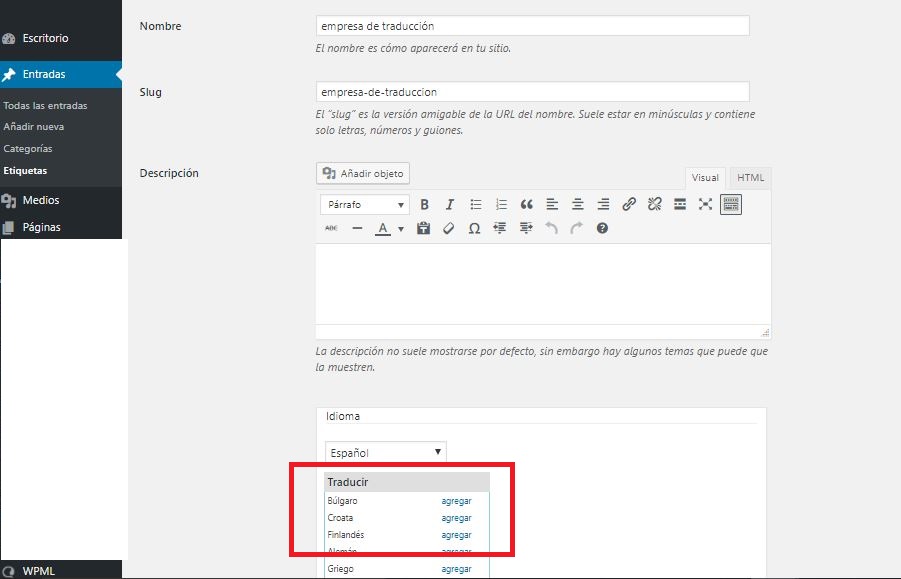
- The first way of translating a tag or category is to directly access each one of them. When you edit a post, you will see a section created by WPML entitled “Language” and you will only have to click the “Add” button in each language you want to translate.
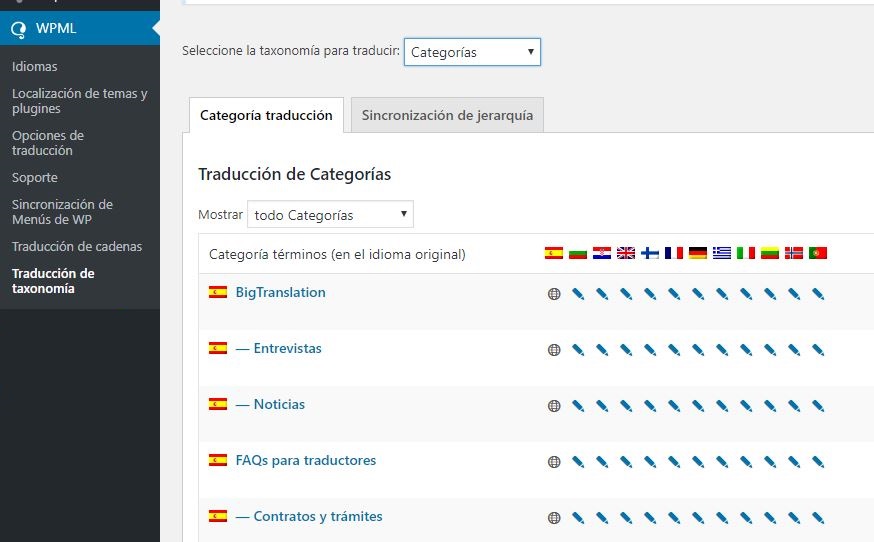
- The second option, and the most advisable, is to access WPML > Taxonomy translation and translate the sections.
Translating Widgets
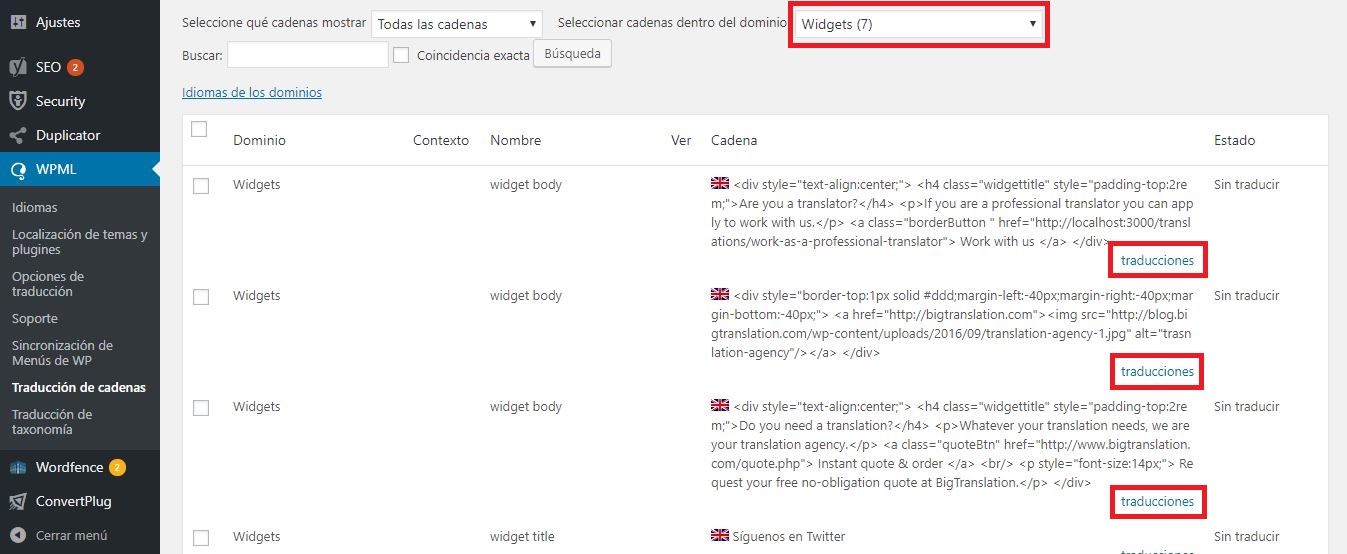
When translating widgets, you need to have the WPML String Translations add-on that we have mentioned above. Although there is more than one way of translating these elements, in this WPML guide we will explain the most used due to being quick and simple: access WPML > String Translation.
In the “Select strings by context” drop-down menu, choose the “Widgets” option (you can see the amount of strings to translate in brackets). If you click on each string, you can translate everything contained in the widgets, be it the title or the content itself. When you have finished the translation, you must check the “Translation completed” box.
Translating Menus
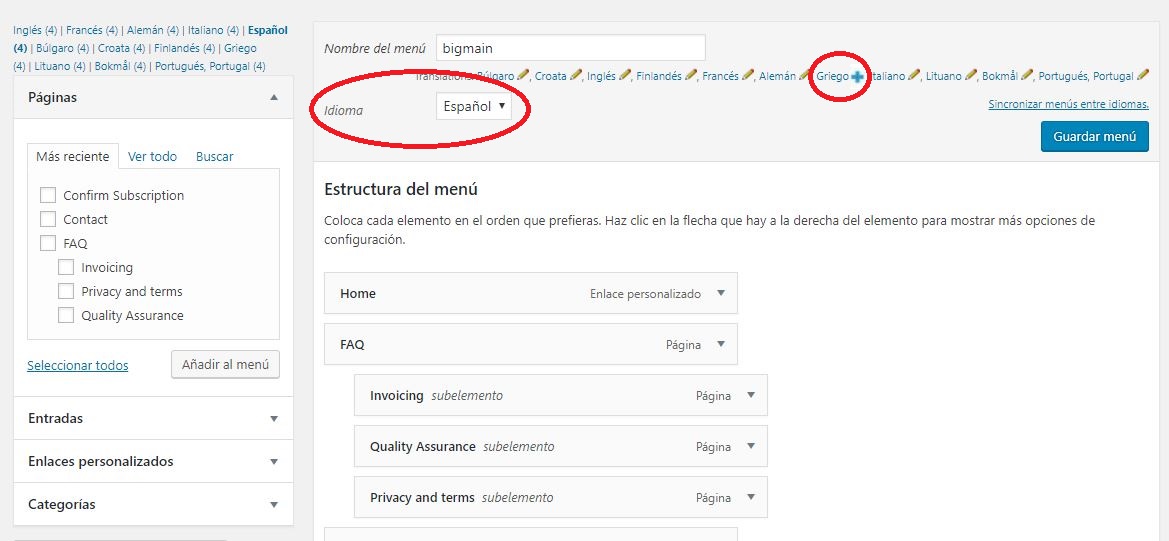
As with other elements, WPML allows you to translate menus and create different menus according to the language by accessing, in this case, Appearance > Menus. The procedure is again very simple, you need only click on the + icons and you will create a new menu, in the desired language, linked to the original. Remember to save them after editing each menu.
Keep learning about how to use WPML!
If this is all new to you, you won’t want to miss what we’ve got on offer: